
As a foodie, aside from understanding the principles and food science of a process, the best way to learn about a food is to experiment and experience it. I've been meaning to have a go a cheese making and finally I have; albeit a basic soft cheese. But it's a start.
Below I outline the steps I took in making my first attempt at a basic soft cheese and show the results I acheived.
Firstly it is imperative to sterilise everything as cheese is an ideal food source for bacteria and during the process the temperatures used also encourage the bacteria growth. It is therefore important only the required good bacteria is allowed to grow and any unwanted micro-organisms are not introduced.

Step 1:
This is the milk I used. 2 Litres of Jersey/ Guernsey cow's gold top milk. For cheese this should be unhomogenised.
Much milk these days is homogenised (process where fat particles broken down in size, this amongst other things eliminates the creamy top that would otherwise form on the milk), so must ensure unhomogenised when purchasing

Step 2:
A starter culture is carefully weighed for the 2 Ltrs milk. (in this case using 0.05g)
Starter cultures are bacteria that mature the cheese and give off Lactic acid which will help in the clotting and maturing of the cheese.
There are various starter cultures available and I chose Choozit MA400 - a general purpose Mesophilic (prefering luke warm temperatures) starter.
Step 3:
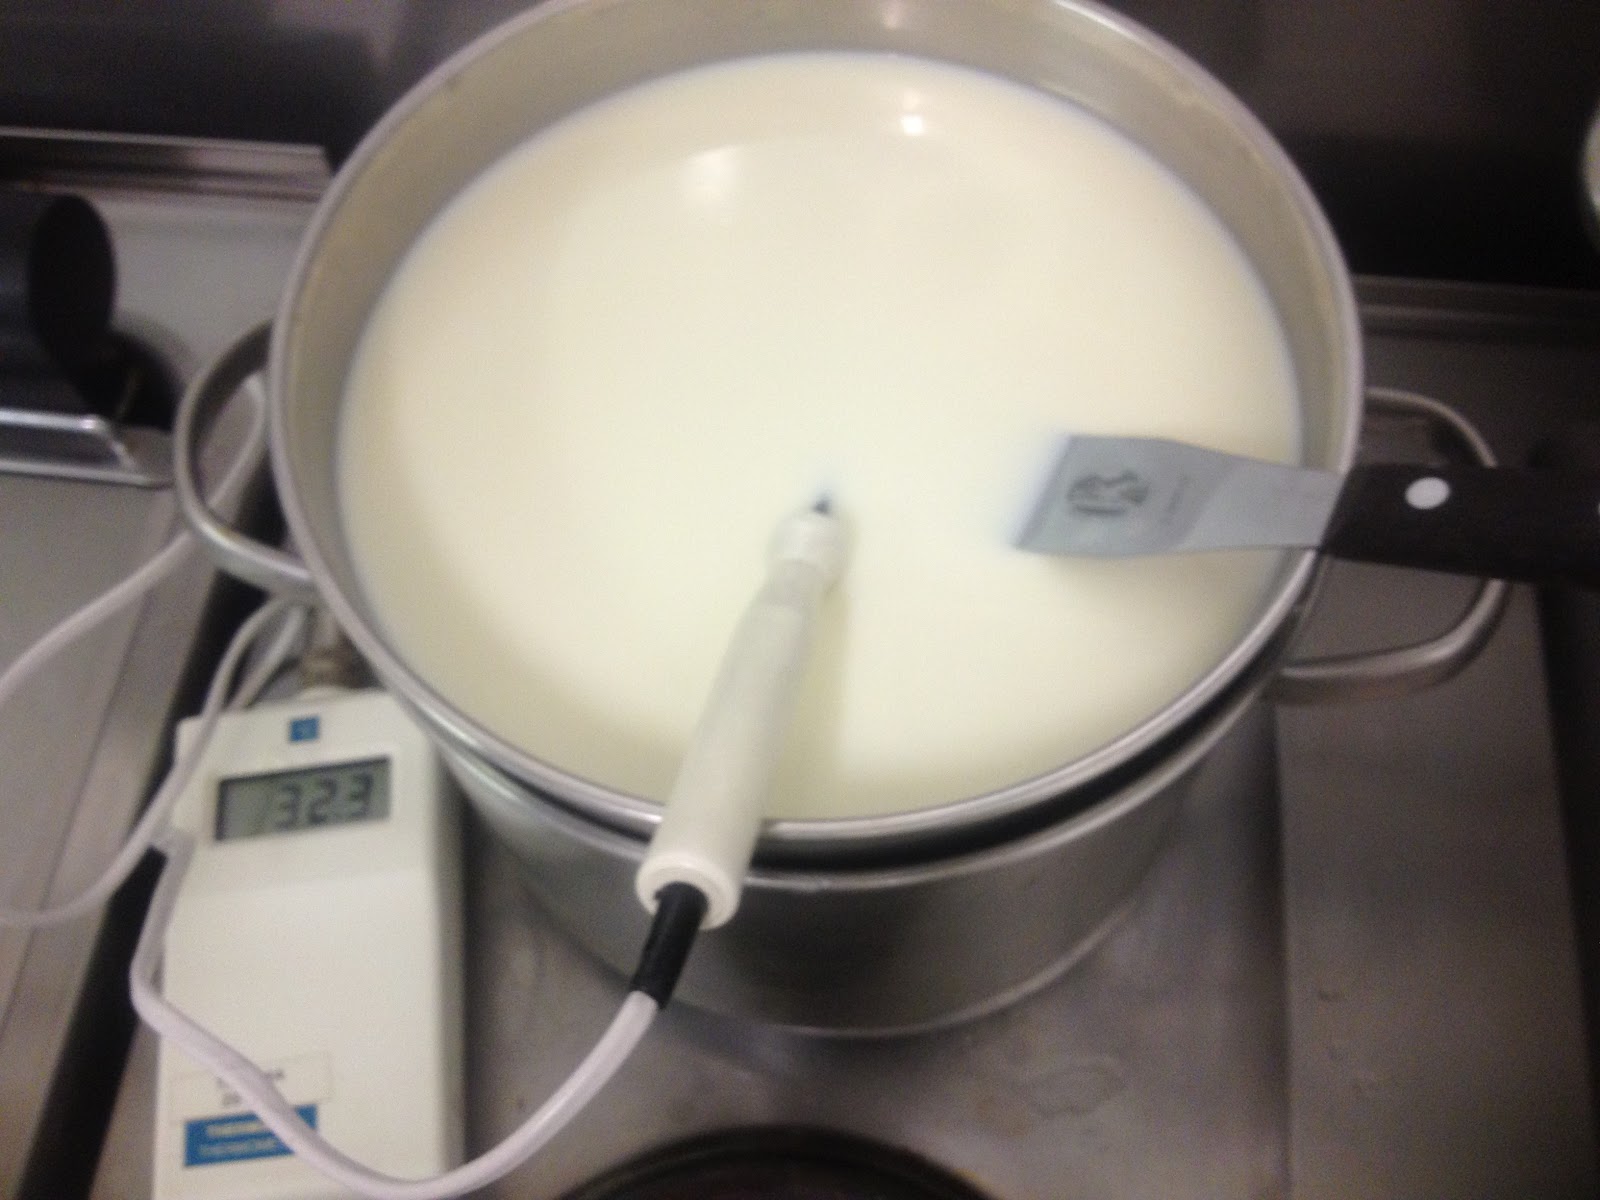
The milk is placed in a bain-marie and gently heated to 32°C.
The measured starter culture was then added. This was stired thoroughly to ensure a good even mix and left for around 30 miutes, whilst maintaining the temperature.


Step 4:
Rennet was then added to coagulate the milk. This being stirred for no more than 3 minutes, then covered and the heat maintained at 32°C. Setting took around 1 hour.
Both Animal and Vegetarian Rennet are available. I chose Animal Rennet (from Calves stomachs) as it is said to work better.
It is important not to overdose on rennet and a small amount goes a long way. For my 2 litres of milk I used just ten drops. This needs to be mixed with cooled boiled water at a ratio of roughly 10:1 Water:Rennet allowing a better mix into the milk.

Step 5:
When the curd will split cleanly when a knife is inserted, it is ready to cut. If it cuts unevenly or in a layered form leave it for longer.
The curd is cut to release and allow the whey (liquid) to drain off, leaving the milk protein (Casein) which then forms the cheese.
Larger cuts alow less moisture to escape from the curd and smaller cuts enable more to escape. So for soft cheeses the cuts tend to be larger and for hard cheeses they are smaller.
 The curd for this cheese was cut into about 15mm cubes as can be seen in the picture (right) to make a soft cheese. It is quite important to keep the cubes as regular as possible as this allows consistent results in the future. ie moisture removal better regulated.


 The curd for this cheese was cut into about 15mm cubes as can be seen in the picture (right) to make a soft cheese. It is quite important to keep the cubes as regular as possible as this allows consistent results in the future. ie moisture removal better regulated.
It can also be seen towards the bottom of the picure (right) that the whey is coming out of the curd (where the cubes are not so well defined)
Initial cutting and draining stage takes about 15 minutes, the curd is stirred a little and checked for any large lumps which are cut if necessary and left for another 15 minutes. Finally the curd was stired again and turned out, shown in the next stage.

Step 6:
The curd is then transfered to a draining tray to further allow the removal of the whey. This can be seen in the collection tray beneath.

Step 7:
The curd is then transfered to moulds.
This will shrink back as more moisture drains off. For around a further hour I added some more curd as this happened.

This will shrink back as more moisture drains off. For around a further hour I added some more curd as this happened.
Step 8:

After a further hour I turned the curds in their molds and then again 2-3 hours later. They were then left overnight to further drain.
The cheese can be seen following this - the pimples are formed by the drain holes of the mold. Note how the cheeses have shrunk back into the molds.
During all these stages the cheese is kept at warm room temperatures ( above 20°C is good)

Step 9: 

The following morning 1% salt 4.78g was sprinkled evenly over the surface of the cheeses. The cheeses where then left for 4-5 hours to drain further.
(Two litres of milk produced 478g of cheese)
Step 10:
One of the four finished cheeses. These where then wrapped in a waxed parchment to avoid too much drying and stored in the fridge. This type of cheese as is should keep for around two weeks.
During the two weeks the cheeses were sampled for flavour. The flavour is quite subtle but does improve with age and best after maturing for one week.
My next experiments will involve flavouring the cheese with herbs etc, also I will experiment with mould ripening, giving a white mould rind to the cheese. This is developed through the use of Penecillium candidum.
No comments:
Post a Comment